Hey, my name is Kelvin John, today I walk you through a step-by-step tutorial, and you’ll learn how to go from zero to a fully working WordPress website hosted on Bluehost. Here’s a quick overview of what we’ll cover:
- How to sign up for a Bluehost account, if you haven’t done so already.
- How to install WordPress on Bluehost.
- How to configure your new site to make it a success.
Right now just relax and read on. Please don’t forget to leave a comment below, if you enjoy or have any interesting options on the topic. I look forward to reading and replying to your comment(s).
Table of Contents
- Introduction: Getting Started with WordPress and Bluehost
- Understanding Bluehost and WordPress
- Why Choose Bluehost and WordPress?
- Step 1: Signing Up for a Bluehost Account
- Step 2: Installing WordPress on Bluehost
- Step 3: Configuring Your New WordPress Site for Success
- Additional Tips and Best Practices
- Troubleshooting Common Issues
- Conclusion
Introduction: Getting Started with WordPress and Bluehost
In this blog post, we’ll start with the basics—why you might choose Bluehost as your hosting provider and what makes WordPress a popular choice for building websites. Then, we’ll dive into the technical details, covering everything from signing up to configuring your site for optimal performance.
Launching a website can be daunting for Newbies or beginners, but with the right guidance, you can create a professional and fully functional WordPress website on Bluehost without any prior technical expertise. In this comprehensive guide, we’ll walk you through every detail—from signing up for your hosting account to customizing your new site. Whether you’re starting a blog, an online store, or a portfolio, this tutorial is designed to make the process as smooth as possible.
Understanding Bluehost and WordPress
What is Bluehost?
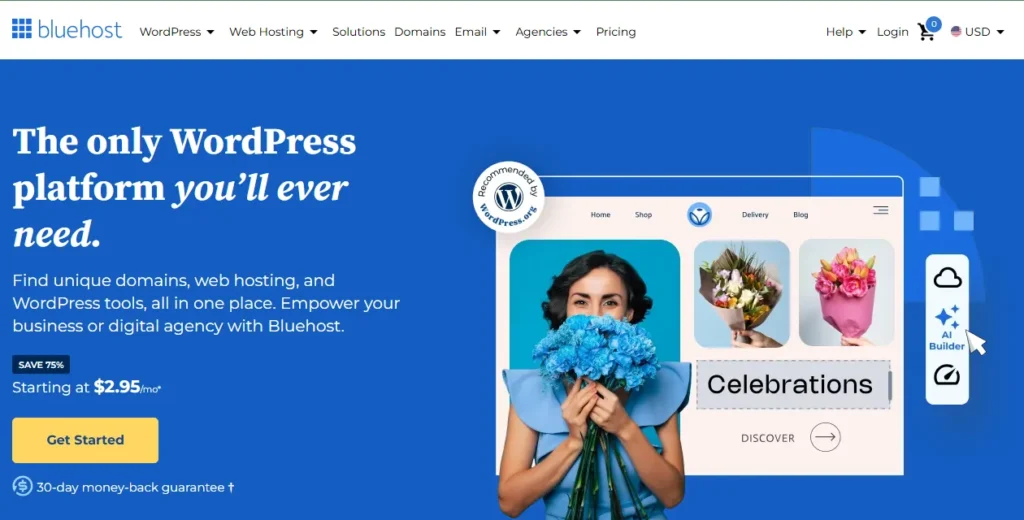
Bluehost is one of the most popular web hosting providers recommended for WordPress websites. Known for its reliability, excellent customer support, and user-friendly interface, Bluehost offers hosting plans suitable for beginners and seasoned website owners. Its integration with WordPress makes it a go-to choice for those looking to build a professional website with minimal hassle.
What is WordPress?
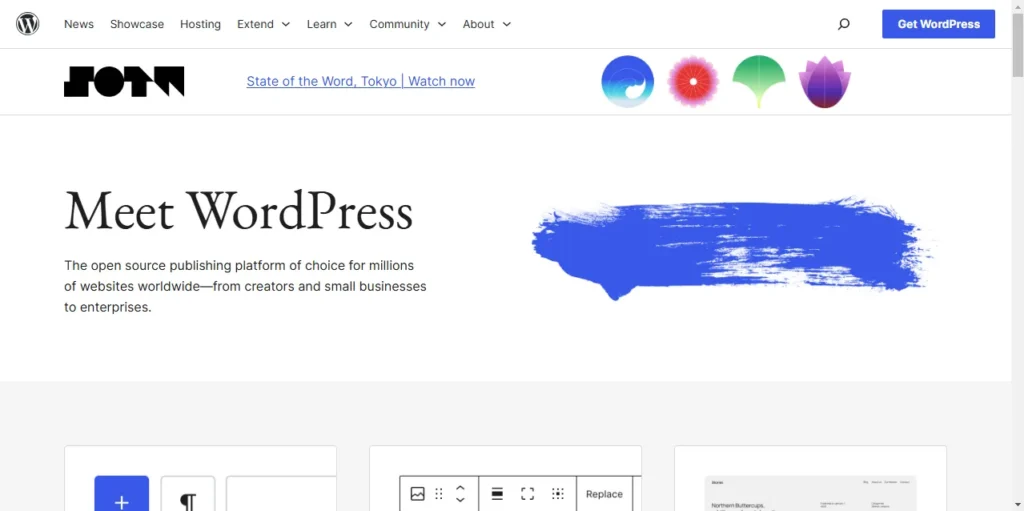
WordPress is a free, open‐source content management system (CMS) that lets you create, manage, and publish websites or blogs with ease. Originally launched in 2003 as a simple blogging tool by Matt Mullenweg and Mike Little. WordPress powers over 40% of all websites on the internet, making it a trusted platform for everything from personal blogs to large-scale corporate sites. It’s highly customizable, easy to use, and boasts an extensive library of plugins and themes that can transform your website into a unique online presence.
But bear in mind there are two types of WordPress. The self-hosted WordPress, which is WordPress.org. It gives you complete control over your website’s functionality and appearance While WordPress.com gives you less control. I will be installing WordPress.org on Bluehost in this tutorial.
Why Choose Bluehost and WordPress?
What Makes Bluehost Stand Out?
- Reliability: Bluehost is known for its excellent uptime and robust performance.
- User-Friendly: With an intuitive interface and one-click installations, even beginners can get started without a steep learning curve.
- Great Support: Bluehost offers 24/7 customer support, which is essential when you’re new to website building.
The Power of WordPress
- Flexibility: WordPress is highly customizable, offering thousands of themes and plugins to tailor your site to your needs.
- Community: With a massive community of developers and users, finding help or additional features is easy.
- SEO-Friendly: WordPress is built with search engines in mind, giving your site a solid foundation to rank well.
Step 1: Signing Up for a Bluehost Account
Before you can start building your website, you need a hosting account. Here’s how you can create one with Bluehost:
1.1 Visit the Bluehost Website
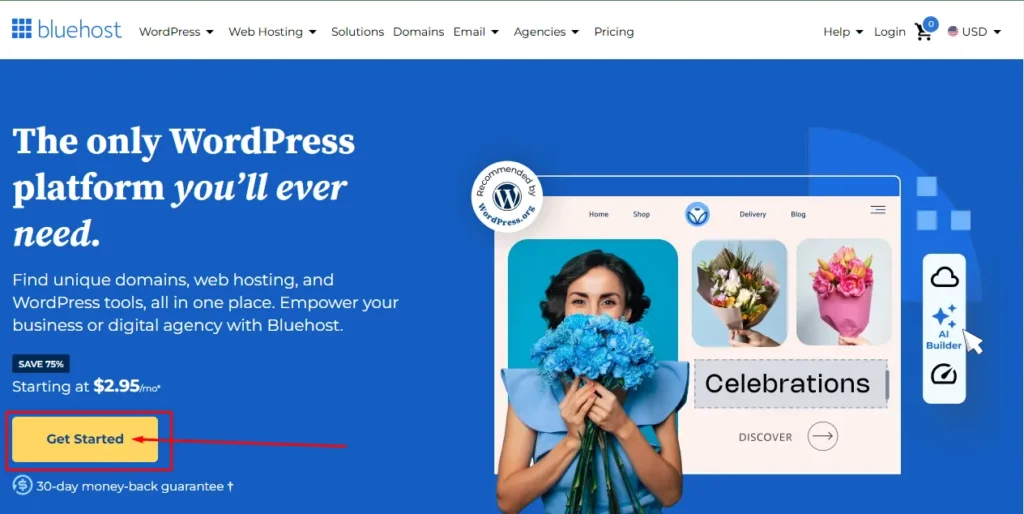
Head over to Bluehost.com using your preferred web browser. Once there, click on the “Get Started Now” button prominently displayed on the homepage.
1.2 Choose a Hosting Plan
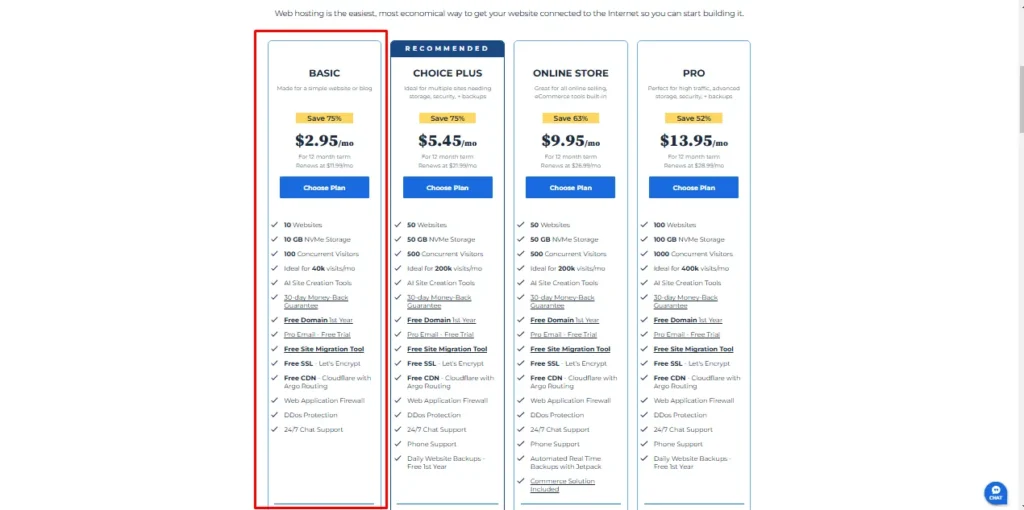
Bluehost offers several hosting plans, but for beginners, the Basic Plan is often sufficient. As your website grows, you can upgrade to a more advanced plan. Compare the features of each plan, paying attention to:
- Storage space
- Bandwidth
- Additional domains
- Included SSL certificates
If you are low on budget, starting a blog or small business with little to no web traffic. I will advise you, to purchase the basic plan. Then as your business grows, you can upgrade to meet your website needs.
1.3 Register a Domain Name
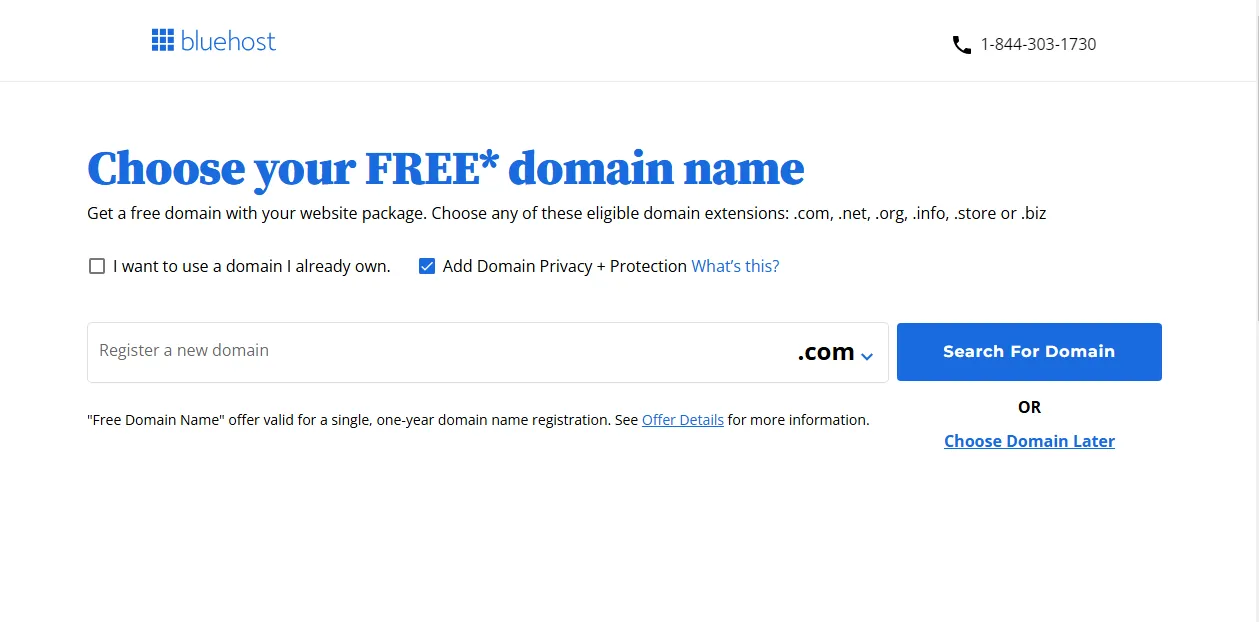
During the signup process, you’ll have the option to choose a domain name. This is your website’s address (e.g., www.originalwholesales.com). You can either register a new domain or use one you already own. All Bluehost plans offer a free domain for the first year!. So you’ll just be paying for your hosting plan.
1.4 Create Your Account
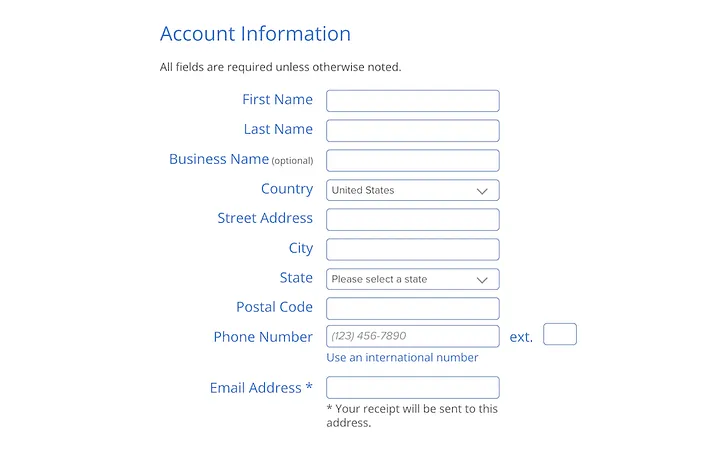
Fill in the required information, including your email address, password, and payment details. Make sure to review the terms and conditions before finalizing your purchase. Once you complete the signup process, you’ll receive a confirmation email from Bluehost with further instructions and access to your control panel.
Step 2: Installing WordPress on Bluehost
2.1 Login to Your Bluehost Control Panel
- Access the Dashboard: Log into your Bluehost account using the credentials you created during signup.
- Navigate to the Control Panel: Once logged in, locate the control panel (often referred to as cPanel) where you can manage all aspects of your hosting account.
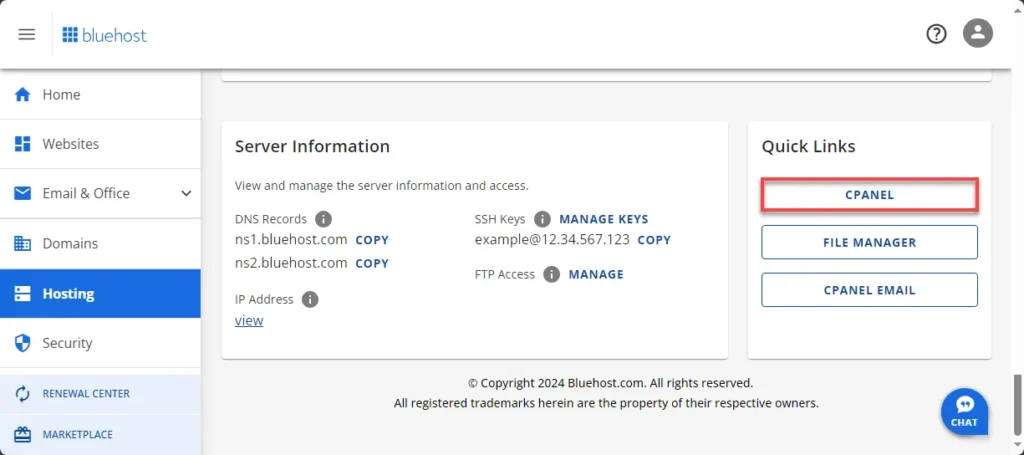
2.2 Locate the WordPress Installer
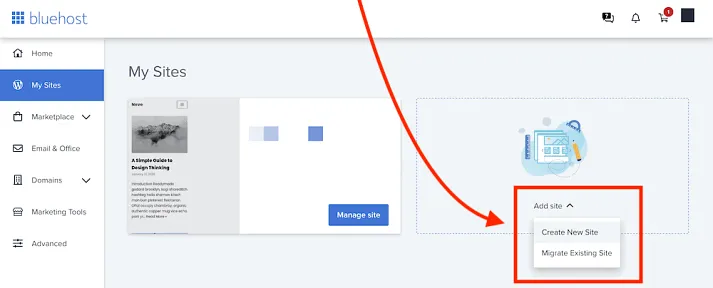
Bluehost’s control panel typically features a section called “My Sites” or “Website”. Look for a button or link that says “Create Site” or “Install WordPress.”
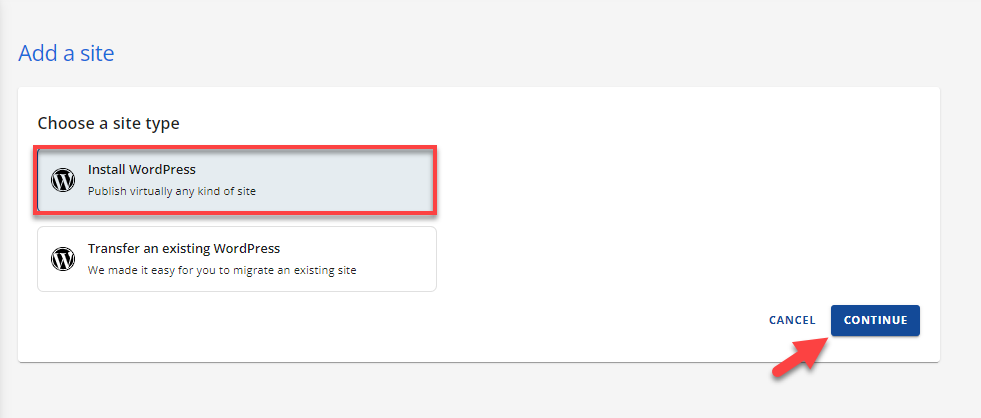
2.3 Launch the One-Click Installer
- Click “Create Site”: Initiate the WordPress installation process.
- Enter Site Details: You’ll be prompted to enter your website name and tagline. These can be changed later, so don’t worry too much about perfection at this stage.
- Choose Your Domain: Select the domain where you want WordPress installed. If you registered multiple domains or subdomains, ensure you choose the correct one.
- Advanced Options: Some installers may offer additional settings such as automatic updates or security enhancements. Configure these based on your preference.
2.4 Complete the Installation
After entering the necessary details, click on the “Install” button. Bluehost will now automatically install WordPress on your chosen domain. This process usually takes just a few minutes. Once completed, you’ll receive a success message along with your WordPress admin URL (e.g., www.yourwebsite.com/wp-admin), username, and password.
Step 3: Configuring Your New WordPress Site for Success
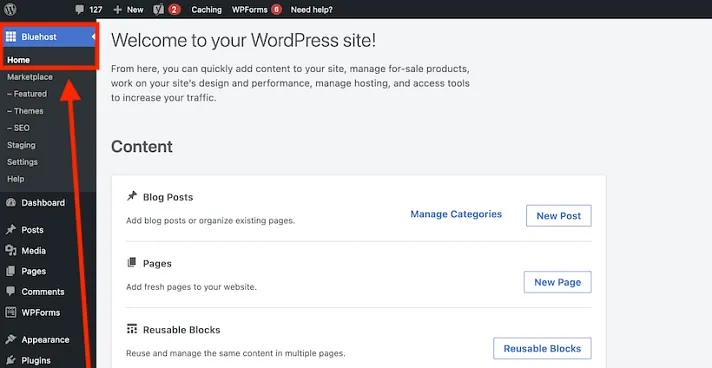
3.1 Logging into Your WordPress Dashboard
- Access the Admin Panel: Go to your WordPress admin URL (e.g., www.yourwebsite.com/wp-admin).
- Login: Enter the admin username and password provided by Bluehost.
- Familiarize Yourself: Take a few moments to explore the dashboard. You’ll find various sections such as Posts, Pages, Appearance, Plugins, and Settings.
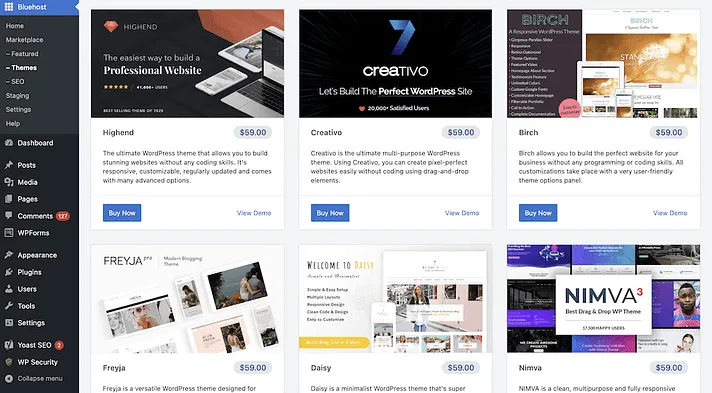
3.2 Choosing a Theme
Your theme determines the overall look and feel of your website. WordPress offers a vast selection of free and premium themes.
- Browse Themes: Navigate to Appearance > Themes in the dashboard.
- Install a Theme: Once you’ve found a theme you like, click “Install” and then “Activate.”
- Customize: Use the Customizer (found under Appearance > Customize) to tweak your theme’s settings, such as colors, fonts, and layout options.
3.3 Installing Essential Plugins
Plugins extend the functionality of your WordPress site. Some must-have plugins include:
- SEO Plugins: These are used to optimize your content (e.g., Yoast SEO or AISEO).
- Security Plugins: To protect your site from malware and attacks (e.g., All-In-One Security or Sucuri).
- Caching Plugins: To improve site speed (e.g., WP Super Cache or W3 Total Cache).
- Backup Plugins: Regular backups are crucial (e.g., UpdraftPlus).
To install plugins, navigate to Plugins > Add New, search for the plugin by name, and click “Install Now” followed by “Activate.”
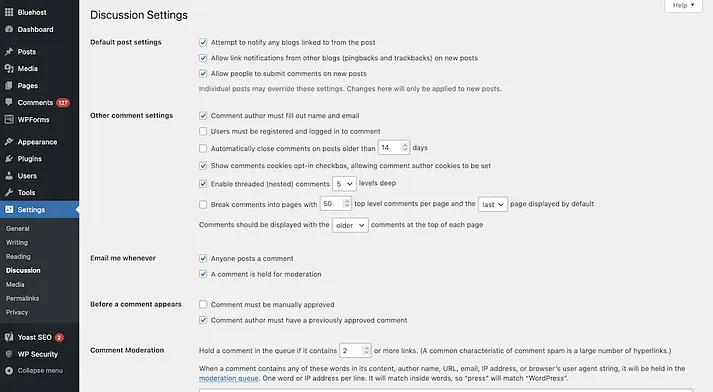
3.4 Configuring Basic Settings
Head over to Settings > General and Settings > Permalinks to configure your site’s basic settings:
- Site Title and Tagline: Ensure these reflect your brand.
- Time Zone: Set your correct time zone to display accurate timestamps.
- Permalink Structure: Choose a URL structure that is both user-friendly and SEO-friendly (e.g., Post name).
Additional Tips and Best Practices
4.1 Security Measures
- Regular Updates: Always update WordPress core, themes, and plugins to their latest versions.
- Strong Passwords: Use complex passwords and consider two-factor authentication.
- SSL Certificate: Ensure your site is secured with an SSL certificate, which Bluehost often includes for free.
4.2 Performance Optimization
- Caching: Use caching plugins to reduce load times.
- Image Optimization: Compress images to speed up your site without sacrificing quality.
- Content Delivery Network (CDN): Consider integrating a CDN for faster content delivery globally. I recommend starting with a free Cloudflare plan.
4.3 SEO and Content Strategy
- Keyword Research: Identify keywords relevant to your niche.
- Quality Content: Regularly publish valuable content that addresses your audience’s needs.
- Analytics: Set up Google Analytics to track your site’s performance and user behavior.
4.4 Regular Backups
- Automated Backups: Set up regular, automated backups to protect against data loss.
- Manual Backups: Periodically export your WordPress database and files for additional security.
Troubleshooting Common Issues
5.1 Installation Errors
- Insufficient Permissions: Ensure that your Bluehost account has the necessary permissions for file modifications.
- Domain Propagation: If your domain is newly registered, it might take a while for DNS settings to propagate.
5.2 Performance Issues
- Slow Loading Times: Check for plugin conflicts and consider using performance optimization plugins.
- Security Warnings: Regularly scan your site for malware and keep all software updated.
5.3 Login and Dashboard Issues
- Forgotten Passwords: Use the “Lost your password?” feature on the login page.
- Dashboard Not Loading: Clear your browser cache or access the dashboard from another browser.
If you run into any problems that I have not covered here. Leave a comment below and I will help you out. You can also reach out to the Bluehost support team and WordPress community forums are excellent resources for help.
Conclusion
Congratulations! You’ve now learned how to install WordPress on Bluehost and configure your site for success. From signing up for a Bluehost account to installing WordPress and fine-tuning your site’s settings, each step brings you closer to having a fully functional website that can grow with your business or passion project.
Remember, building a website is an ongoing process. Continue exploring WordPress’s vast array of plugins, themes, and customization options to keep your site fresh and engaging. And, as always, feel free to revisit this guide if you need a refresher on any of the steps.
I hope you found this tutorial helpful and easy to follow. Please don’t forget to leave a comment below, if you enjoy or have any interesting options on the topic. I look forward to reading and replying to your comment(s).
Happy blogging and cheers to your online success!
